If you’ve ever wanted a barn door for your home, you’ve probably wondered how to build one. While purchasing a barn door may be an attractive idea, it can burn a hole in your wallet. The good news is that building your own barn door is easy and inexpensive. Follow the steps outlined below to build the door of your dreams. After you’ve completed the steps below, you can add a picture frame to the door for a beautiful finishing touch.
Installing a sliding barn door
The installation of sliding barn doors is quite similar to that of other interior passage doors or closet doors. The first step is to hang the door on the track. Then, you’ll need to attach the door rail and bolts. This process can be difficult if the wall isn’t plumb. If you’re not experienced with such a project, a professional can install the barn door safely and accurately.
To install a sliding barn door, you will need to first measure the width of the opening you plan to cover with the door. You should leave a gap of around two inches, plus an inch on each side. You’ll need approximately eight feet of track for a four-foot door. To make your door wider, you can install connectors from the hardware manufacturer. Make sure that you measure the size of the opening before you install the door.
After you have determined the height of the rail, install the hinges and rail spacers. You’ll need two people to do this job. You’ll need a helper to hold the door and secure the hardware. Next, tilt the door so the rollers hook over the track. You might need a helper if the door is heavy. Finally, you’ll need to attach stoppers and decorative hardware.
When installing sliding barn doors, remember that safety is your top priority. Be sure to follow all safety guidelines. Sliding barn doors can damage walls if they are not installed properly. It’s a good idea to check with your local building code before doing any work. If you have a permit to install sliding doors, you can follow the steps listed below. It’s a simple project, but if you don’t follow the guidelines listed here, you’ll likely run into some problems.
Making a temporary jig for your door
Before you begin, you’ll need to make a temporary jig. Cedar wood is best worked with stainless steel fasteners. First, cut 18 1x10x96″ T&G boards in half, removing the groove on one side. Next, place (2) 2×4 boards on a flat, level surface. This temporary jig will help you form the shape of an L. Cut one side to be eight feet long, and the other side to be 6.5 feet long. This temporary jig will help you cut a perfect L shape.
Next, measure the height of your barn door. Remember that the door will extend two inches from the opening. The height of the door will depend on how high you want it to be. You may want to make a temporary jig of this length and attach it to the frame. Be sure to use a low-VOC paint to protect your animals. You can then install the door.
When attaching the barn door, be sure to cut the hinges to fit. Ideally, the hinges will be six to eight inches apart. Make sure to cut them out of the door jamb as well. Then, install the door, ensuring that the door is flush with the outside trim. If you’re working on a rustic door, you may want to make a temporary jig of the door to avoid sanding the door.
Once you’ve made your temporary jig, measure the door’s opening. It will make it easier to make a proper door. If you measure it correctly, the door will hang smoothly. Remember, the jambs will line up the rough opening. If you’re working with a smaller door, it’s possible to get away with a raw framed opening. If not, make sure to measure the door’s width and length to avoid any mishaps.
Using a tube track
You can build a barn door by using a hollow steel tube. You can purchase one from Home Depot for about $15. Next, use a bolt and washer to attach the track to the wall. When securing the tracks to the wall, leave enough space between them so that the wheel of the door can pass through. Check that they don’t hit the steel attached to the wall or the screw at the front of the track. Finally, use a closet door wheel to assemble the track.
If you want a sliding barn door that doesn’t require screws, you can use a track made of stainless steel. It is made with precision and quality materials, and works with any style interior door. The hardware comes in several lengths to match any interior door. Goldberg makes a variety of track sizes and styles. You can find the track length you need for your project by checking out their catalog.
When selecting your track, make sure to buy a set that is at least two times wider than the door. It will allow for a greater weight capacity than other styles of track. Because it has a higher weight capacity than other styles of track, it’s a great choice for large or heavy doors. A tube track also offers increased security compared to a standard sliding door track. This means that you can rest assured that your door will slide smoothly without squeaking or banging into the wall or ceiling.
Once the frame is complete, you can start assembling the door panels. For the panel pieces, you can use a straightedge to mark the centerline of each door panel. Then, using a combination square, mark one chevron 1/8 inch short of the overlap. Then, use a hammer and drill holes through each panel to secure them to the track. Using a tube track is easy and cost-effective.
Adding a picture frame
Adding a picture frame to a rustic barn door is a great way to add some character to your home decor. The natural wood of the barn door has a vintage look and is both functional and fashionable. If you have a small door, you can use two small triangle hooks on the back to hang your picture. A picture frame can hold a 5″ x 7″ photo or artwork.
Another way to add a barn door picture holder is to use faux wood cardstock. It can be purchased at any craft store, or you can create one yourself. First, use decoupage glue to adhere faux wood cardstock to the cardboard. Then, glue miniature picture frames on top of the faux wood. The finished picture frame looks beautiful in a kitchen, living room, or anywhere else.
To add a picture frame to a barn door, use a wood-frame picture frame that has a mirror or chalkboard. These are available in a variety of sizes, so you can add a frame that matches your décor. A simple barn-door picture frame will add a charming accent to your room. If you do not have a photo frame, consider using a sliding barn-door picture frame with a mirror.
Installing hardware
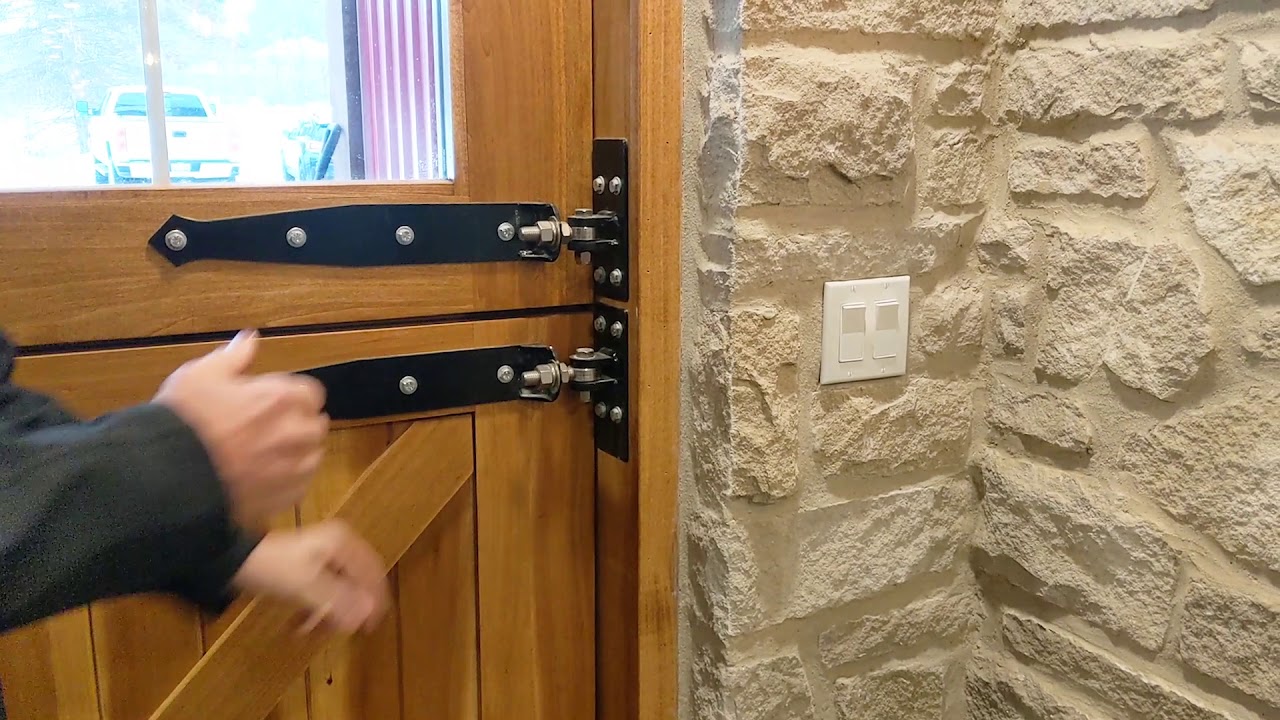
When building a barn door, installing hardware is a critical step. Some barn door kits come with predrilled holes for the handles and strap hangers. Then, install the straps and lag bolts to secure the door. A speed square is helpful for aligning straps and screws to prevent misalignment. Before securing straps, install door handles and rollers and test them to ensure smooth operation.
To install the tracks, drill holes on the wall and align them with the studs. Make sure that the track is about 3 inches or so away from the edge of the door. Use a 3/16″ drill bit to screw the hardware in place. Once the track has been installed, install the rail spacers by lining up the rail with the first hole and the second hole. Install the rail spacers snugly.
Before attaching the straps and rollers to the door, install the backer board. Make sure the backer board is level and a minimum of 1 inch thick. After installing the track, paint the backer board the same color as the door’s frame. After painting, check for stud locations and mark where the screws are. Once the screws are secure, install the hardware, handles, rollers, and anti-jump disks. If the door already has hardware, skip this step. If not, install handles, rollers, and anti-jump disks as instructed in the instructions.
Next, install the floor guides. These guides will ensure that the barn door glides smoothly and stays in place. Some floor guides fit into the bottom groove while others go under the side of the door. They must be installed correctly, according to the manufacturer’s directions and screw locations. Then, install the rails, using construction adhesive or nails to secure the boards to the floor. After installing the rails, adjust the length of the rails according to the measurements to ensure that the door is square.